|
The Header Options box provides the option to add headings above the data or to the left of the data to mapped data.
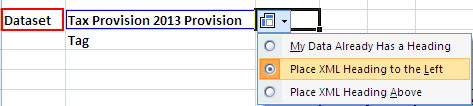
To add a heading to the left of the data:
| 1. | After mapping data on the worksheet, click the header box to the right of the mapping indicator lines. |

| 2. | Select Place XML Heading to the Left. |
| 3. | The heading is placed in the selected location. |
Note: If you do not want to lose existing data when placing a header, be sure the cell is blank or previously mapped.
| A. | By selecting Place XML Heading to the Left, the data to the left of the element is not mapped, and the new heading replaces the existing data. |
| B. | If the data to the left is mapped, the Place XML Heading to the Left option is greyed on the menu. You cannot overwrite the data. |
To add a heading above the data:
| 1. | Select Place XML Heading Above. If no heading is typed on the worksheet, the title appears from the corresponding XML Source pane element. |
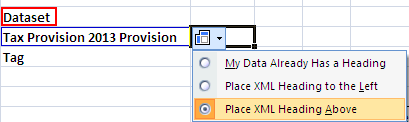
| 2. | If a title currently exists, it is replaced by the title from the XML Source pane. |
|


